Introduction
If you have ever stood in front of a mirror holding a tangled, flat synthetic wig and thought, “How am I going to pull this off?” you are not alone. Learning how to style an Asuka Evangelion wig is one of the most searched topics in the cosplay community, and for good reason. Asuka Langley Soryu is iconic. Her bold orange-red twin tails and signature hair clips make her one of the most recognizable anime characters ever created. Getting her look right matters.
This guide walks you through everything you need to know about how to style an Asuka Evangelion wig. You will learn which tools to use, how to create those perfect twin tails, how to secure her iconic clips, and how to keep the wig looking great all day at a convention. Whether you are a first-time cosplayer or a seasoned pro, this article gives you clear, actionable steps you can follow right now.
Why Getting the Asuka Wig Right Is So Important
Asuka is not a forgiving cosplay. Her hairstyle is specific and structured. Fans know it immediately. A limp or unstyled wig can throw off the entire costume, no matter how good your plugsuit looks.
When you nail how to style an Asuka Evangelion wig, the whole cosplay transforms. People notice. You feel more confident. And your convention photos look stunning.
The good news? You do not need to be a hairstylist. You just need the right tools, the right technique, and a little patience.
What You Need Before You Start
Before you begin styling, gather everything. Stopping halfway to search for supplies ruins your momentum and can leave the wig in a bad state.
Essential Tools for Styling an Asuka Evangelion Wig
- A high-quality orange-red cosplay wig (heat-resistant fiber is strongly recommended)
- Two hair ties or elastic bands
- A wide-tooth comb
- A fine-tooth rat-tail comb
- Wig styling spray or light-hold hairspray
- Bobby pins and wig-safe clips
- Asuka’s signature red hair clips (you can buy these or DIY them)
- A wig head or styrofoam mannequin
- A low-heat curling iron or flat iron (only if your wig is heat-resistant)
- Scissors (only for minor trimming)
Investing in the right supplies before you learn how to style an Asuka Evangelion wig saves you from frustration later. Do not skip the wig head. It makes the entire process easier and more precise.
Step-by-Step Guide to Style an Asuka Evangelion Wig
Step 1: Prepare and Detangle the Wig
Start with a clean, detangled wig. Place it on your wig head and secure it with wig pins. Use a wide-tooth comb and work from the tips upward. Never yank from the roots. Pulling from the roots causes fiber breakage and frizz that is very hard to fix.
Spray a light mist of wig detangler or fabric softener mixed with water if the wig is particularly knotted. Gently work through every section. Take your time here. This base is the foundation of how to style an Asuka Evangelion wig successfully.
Step 2: Part the Hair Correctly
Asuka’s hair parts slightly to the right. Use your rat-tail comb to create a clean part. The part should not be perfectly centered. Keep it natural and slightly off-center to match the anime reference images.
Look up reference screenshots of Asuka from Neon Genesis Evangelion or Rebuild of Evangelion before you part. Accuracy matters here. Fans notice when the part is wrong.
Step 3: Section the Hair Into Two Equal Portions
This is where the twin tails begin. Divide the wig into two sections using your rat-tail comb. The sections should be roughly equal. Each tail should sit at mid-ear level, not too high and not too low.
Hold each section temporarily with a butterfly clip while you work on the other side. Even, balanced sections are the key to getting how to style an Asuka Evangelion wig looking screen-accurate.
Step 4: Create the Twin Tails
Gather your first section and twist it gently at the base. Wrap a hair tie around it twice. Make sure the twist is tight enough to hold but not so tight that it distorts the wig fibers.
Repeat on the other side. When both tails are secured, stand back and check the balance. Are they at the same height? Are they the same volume? Adjust now before you move to the next step.
Asuka’s tails are thick and slightly rounded at the ends. If your wig fiber is thin, you can tease the inside of each tail lightly with a fine-tooth comb to add volume. This is a stylist trick that makes a huge visual difference when you style an Asuka Evangelion wig.
Step 5: Shape the Tails
Asuka’s twin tails do not just hang straight. They have a gentle outward curve. This is one of the most important details in how to style an Asuka Evangelion wig.
If your wig is heat-resistant, use a low-heat curling iron (around 250 to 300 degrees Fahrenheit). Wrap each tail loosely around the barrel and hold for five to seven seconds. Release and let it cool completely before touching. Repeat until you get that soft, outward wave.
If your wig is not heat-resistant, use the hot water method. Wrap the tails around a foam roller or thick dowel rod. Dip the styled section in hot (not boiling) water for ten seconds, then let it air dry completely. This sets the shape without heat damage.
Step 6: Style the Front Pieces and Bangs
Asuka has shorter pieces framing her face on both sides, along with front bangs that sweep slightly to the side. Use your rat-tail comb to pull out these frame pieces before you start on the bangs.
Comb the bangs forward and shape them with your fingers. They should sit naturally without looking stiff. A tiny spritz of wig-safe hairspray locks them in place without making them look crunchy.
This step is often skipped by beginners, but it adds a lot of realism to how to style an Asuka Evangelion wig. Those small framing pieces complete the face shape and make the whole look click.
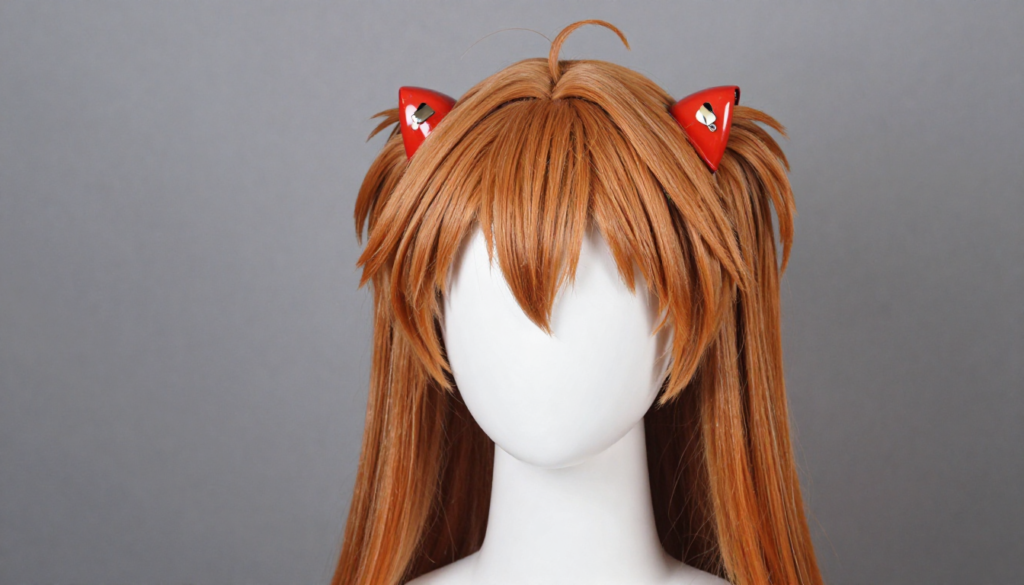
Step 7: Add Asuka’s Signature Hair Clips
You cannot complete how to style an Asuka Evangelion wig without her red interface hair clips. These are the small red rectangular clips she wears on the left side of her head, just above the temple area.
You can purchase accurate replica clips on Etsy, Amazon, or specialty cosplay shops. Slide them onto the wig fiber at the correct position. Use a bobby pin hidden underneath to keep them from sliding during wear.
If you are making DIY clips, use red craft foam or red acrylic and shape them to approximately 2 by 0.5 centimeters. The details matter because these clips are one of the most recognizable parts of her design.
Step 8: Final Shaping and Setting
Once everything is in place, do a final inspection. Check the twin tails for symmetry. Check the clips for placement. Look at the bangs and framing pieces.
Lightly apply wig-safe hairspray from about 10 inches away. Do not overdo it. A light coat gives hold without making the wig look flat or stiff.
Let the hairspray dry for five minutes before you touch anything. This final step locks in all your work and ensures that how to style an Asuka Evangelion wig stays looking great for the full day at your event.
Common Mistakes to Avoid When Styling an Asuka Wig
Using Too Much Heat
Heat is the enemy of non-resistant wig fibers. Even heat-resistant wigs can be damaged by temperatures that are too high. Always start low. You can always add more heat. You cannot undo a melted wig.
Skipping the Wig Head
Trying to style directly on your head is awkward and inaccurate. A wig head gives you the right proportions and lets you stand back to judge the result objectively.
Buying the Wrong Base Wig
Not all orange-red wigs look the same. Asuka’s hair is a vivid, warm red-orange. Some wigs lean too red. Others look too orange or too copper. Buy from a seller who shows real product photos under natural lighting. Choosing the right base color is the first step in how to style an Asuka Evangelion wig correctly.
Making the Tails Too High or Too Low
Asuka’s tails sit at mid-ear level. Too high looks like a different character entirely. Too low looks droopy. Reference images are your best friend here.
How to Maintain Your Asuka Evangelion Wig Between Wears
You put real effort into learning how to style an Asuka Evangelion wig. Protect that work between conventions.
Store it properly. Place the wig back on a wig head or in a hairnet inside a bag. Keep it away from direct sunlight, which fades wig fiber over time.
Detangle gently after each wear. Even a few hours of movement can cause tangles. Comb through the wig before storing it.
Wash only when necessary. Overwashing dulls the fiber and loosens the style. Use wig shampoo and cool water. Reshape and air dry completely before storing.
Re-style before each event. Even with good storage, twin tails often need a quick touch-up. Budget 20 to 30 minutes before your next convention for a fast restyle.
Choosing the Best Wig for Asuka Cosplay
The quality of your base wig determines 50 percent of your final result. You can have perfect technique, but a cheap wig with dull fiber will never look right.
Look for these features when shopping for a wig to use when you style an Asuka Evangelion wig:
- Heat-resistant fiber for curling and shaping flexibility
- Dense fiber count so the twin tails look thick and full
- Vivid, accurate color that matches the anime reference
- Pre-styled or long enough to create twin tails (at least 20 inches of length)
- Adjustable cap for a comfortable all-day fit
Top cosplay wig brands like Arda Wigs, Epic Cosplay, and Rolecosplay are popular choices. Read reviews from cosplayers specifically who styled an Asuka Evangelion wig. Their photos and feedback are the most honest guide you will find.
Quick Tips From Experience
I have styled dozens of character wigs over the years, and a few lessons stand out specifically for this one. First, always prep your clips before you start the wig. Searching for them mid-session disrupts your flow. Second, use two mirrors during styling, one in front and one behind, so you can judge the twin tail placement accurately. Third, bring a small emergency kit to conventions, including extra bobby pins, a travel-size hairspray, and a rat-tail comb. Twin tails can shift during a long day. A two-minute fix keeps your look sharp.
Asuka Wig Styling for Different Events
Conventions
At conventions, durability matters most. Use extra bobby pins at the base of each tail. Style the wig to be slightly tighter and more secured than you would for a photoshoot. You will be moving, posing, and possibly navigating crowds.
Photoshoots
For photoshoots, you can afford to style an Asuka Evangelion wig with a bit more looseness and natural movement. The camera catches beautiful movement that static styling cannot. Use less hairspray and allow the tails to flow.
Halloween
For Halloween, a quick version of how to style an Asuka Evangelion wig works fine. Focus on the twin tails and the red clips. Accuracy can be slightly less precise than for a dedicated cosplay event.
Frequently Asked Questions
What color wig do I need for Asuka Cosplay?
You need a vivid red-orange wig. Asuka’s hair is often described as auburn or copper-red, but it leans toward orange in most anime depictions. Look for a wig labeled “auburn,” “copper,” or “bright orange-red.”
Do I need a heat-resistant wig to style an Asuka Evangelion wig?
Not necessarily, but it makes shaping the twin tails much easier. If you do not have a heat-resistant wig, use the hot water method described above to set the curve of the tails.
How long should the wig be for Asuka’s twin tails?
The wig should be at least 20 inches long. Asuka’s tails fall to approximately mid-torso level. If the wig is too short, the tails will look stubby and inaccurate.
Where can I buy Asuka’s red hair clips?
You can find them on Etsy from cosplay accessory sellers, on Amazon, or on AliExpress. Search “Asuka interface clips” or “Asuka NERV hair clips.” Many sellers offer high-accuracy replicas at low cost.
How do I keep the twin tails from drooping during the day?
Use double-wrapped hair ties at the base of each tail and secure with two or three bobby pins underneath. A light spritz of extra-hold wig-safe hairspray adds extra durability.
Can I style an Asuka Evangelion wig without a wig head?
You can, but it is much harder. A wig head gives you proper proportions and lets you work with both hands. If you must work without one, secure the wig inside a box or over a round object of similar head size.
How long does it take to style an Asuka Evangelion wig?
For a beginner, budget one to two hours for a first-time full style. With practice, you can complete how to style an Asuka Evangelion wig in about 30 to 45 minutes.
What kind of hairspray is safe for cosplay wigs?
Look for hairsprays labeled “wig-safe” or those that are water-soluble. Got2b Freeze Spray is popular in the cosplay community. Avoid heavy oil-based sprays, which attract dust and dull the wig fiber.
How do I prevent the wig from slipping on my head?
Use a wig cap before putting on the wig. Wig grip bands or bobby pins through the wig cap and into the wig also help. Adjust the wig cap straps inside the wig for a snug fit.
Is Asuka’s wig from NGE different from Rebuild of Evangelion?
Slightly. In Rebuild, Asuka’s hair appears a touch more red and her style is slightly more polished. The twin tails and clips are the same. Most cosplayers base their style on the more classic NGE look, but both are great references.
Conclusion
Styling an Asuka wig is one of the most rewarding challenges in anime cosplay. When it comes together, the look is powerful and instantly recognizable. The key is preparation, the right tools, and attention to detail.
Start with a quality base wig. Detangle carefully. Create even, balanced twin tails at mid-ear level. Curl for that outward wave. Add the red interface clips. Set everything with a light hold spray. That is the complete path to mastering how to style an Asuka Evangelion wig from start to finish.
You now have every tool and technique you need. The only thing left is to try it. And when you do, share your results. The cosplay community loves seeing your take on an iconic character, and your work might inspire someone else who is just starting their own Asuka cosplay journey.
What part of styling an Asuka wig feels most challenging for you? Drop your question or experience in the comments below.
Author Bio
Johan Harwen is a cosplay creator and wig stylist with over eight years of experience in anime and gaming cosplays. Jamie has attended more than 40 conventions across North America and regularly shares tutorials on wig preparation, styling, and maintenance. Known for screen-accurate builds and beginner-friendly guides, Jamie is passionate about making cosplay accessible to everyone.
Also read asukaevangelion.com
Email: johanharwen314@gmail.com
Author Name: Johan Harwen