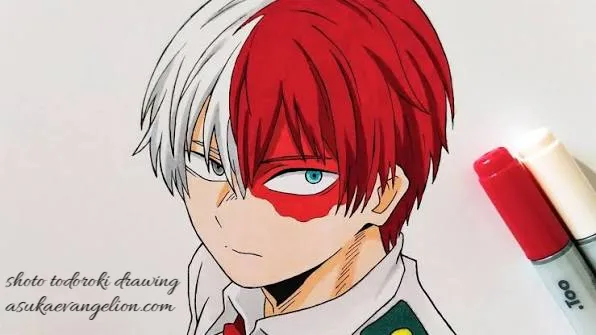
Learning to draw Shoto Todoroki is a great choice for anyone who enjoys anime and manga art. His recognizable two-toned hair, distinctive eyes, facial scar, and calm expression give beginners several memorable features to practice without requiring an extremely complicated pose.
This Shoto Todoroki drawing tutorial takes you from simple construction shapes to a finished character sketch. You can follow the instructions with an ordinary pencil and sheet of paper, then use colored pencils, markers, or digital tools to finish your artwork.
Todoroki is one of the most recognizable characters from My Hero Academia. In the official anime character information, his Quirk is described as Half-Cold Half-Hot, allowing him to produce ice from his right side and flames from his left.
The goal here isn’t to copy every tiny detail at once. Instead, you’ll build the character in manageable stages so your proportions, facial features, hair, and costume have a stronger foundation.
What You Need to Draw Shoto Todoroki
You don’t need expensive art supplies for an easy anime drawing. Start with:
- A pencil
- An eraser
- A clean sheet of paper
- A black pen or fineliner for outlines
- Colored pencils, markers, or crayons
- A ruler for optional construction guides
If you’re drawing digitally, you can use the same process with a light sketch layer followed by a separate line-art layer.
Beginner tip: Keep your first construction lines light. They are guides, not part of the finished drawing.
How to Draw Shoto Todoroki Step by Step
The easiest approach is to divide the character into recognizable sections: head, face, hair, eyes, scar, neck, shoulders, costume, and finishing details.
1. Start With the Head and Face Shape
Begin with a light oval or slightly angular shape for Todoroki’s head.
Anime characters often use simplified facial proportions, but Todoroki’s face should still have enough structure to look like an older teenage character rather than a very young cartoon character.
Follow these steps:
- Lightly draw an oval for the head.
- Add a vertical guideline through the center.
- Draw a horizontal guideline across the face to position the eyes.
- Narrow the lower part of the oval slightly to create the jaw.
- Add small guide marks for the ears.
- Extend two light lines downward for the neck.
Don’t worry about making the head perfect immediately. The guidelines will help you position the facial features symmetrically.
A useful proportion trick
The vertical centerline is particularly important because Todoroki’s face is visually divided by his distinctive hair and scar. Keeping the construction balanced will make the final Shoto Todoroki anime drawing much more recognizable.
2. Draw Shoto Todoroki’s Two-Toned Hair
Todoroki’s hair is one of the easiest ways to identify him.
His hairstyle is divided into two contrasting sections, so establish that division before adding individual hair locks.
Start by:
- Sketching the overall hair silhouette around the skull.
- Creating the central division between the two hair colors.
- Adding short, pointed locks around the forehead.
- Drawing bangs that overlap slightly onto the forehead.
- Building the sides and top with irregular, spiky shapes.
- Erasing sections of the original head outline hidden by the hair.
Avoid drawing every strand individually. Anime hair looks more natural when you create larger groups of hair locks first and then add a few smaller points.
How to draw the hair more naturally
Think of the hair as several connected shapes rather than dozens of separate lines. Start with the scalp and work outward. Then use curved and jagged lines to create the characteristic manga hair silhouette.
This approach is especially useful for a Todoroki drawing for beginners because it keeps the process simple.
3. Add Todoroki’s Eyes and Facial Features
Once the hair is established, focus on the eyes because they strongly influence his expression.
Draw the eyes beneath the horizontal guideline. Keep their shapes similar but remember that anime eyes don’t always need to be perfectly identical.
Add:
- Upper eyelids
- Lower eye lines
- Irises
- Pupils
- Small highlights
- Eyebrows
Then add the nose using a few subtle lines rather than a highly detailed realistic structure.
For the mouth, a short horizontal or slightly curved line is usually enough.
Pay attention to Todoroki’s eyes
One of Todoroki’s visual characteristics is the contrast between his eyes. When coloring, this difference can help reinforce the character’s identity. Keep the eye shapes relatively restrained if you want to capture his usually serious expression.
4. Draw Shoto Todoroki’s Facial Scar
The scar is another essential feature.
Place it around the eye on the side of his face associated with the scar. Rather than drawing one perfectly smooth line, use an irregular shape that follows the contours of the surrounding skin.
A simple method is:
- Lightly outline the general scar shape.
- Check its position against the eye.
- Add the irregular edges.
- Darken the final outline only after you’re satisfied with the placement.
The scar should be noticeable without overwhelming the rest of the face.
Common mistake: making the scar too large or too dark. Start lightly and increase its definition gradually.
5. Sketch the Neck, Shoulders, and Body
After completing the head, move downward.
Draw the neck beneath the jaw and lightly sketch the shoulders. If you’re creating a full-body Shoto Todoroki drawing, continue with the torso, arms, hands, legs, and feet.
For a beginner-friendly character drawing, however, a bust or waist-up composition can be easier.
Use simple shapes first:
- Cylinders for arms
- Rounded shapes for shoulders
- Basic blocks for the torso
- Simple shapes for hands
- Long construction shapes for legs
Don’t add clothing details yet. First make sure the body has a balanced pose.
Full-body drawing tip
If you want to draw Todoroki standing, lightly sketch a central body line from the head through the torso and legs. This helps prevent the figure from leaning unintentionally.
6. Add His Hero Costume
Once the body proportions are working, add the costume over your construction sketch.
Focus on the major shapes first:
- Collar
- Shoulder areas
- Main garment
- Belt or waist details
- Gloves
- Boots
- Costume accessories
Don’t immediately draw every seam. Large clothing shapes should come first, followed by smaller details.
Use curved lines around the shoulders and elbows to show how fabric bends. Add a few fabric folds where the material naturally compresses.
This creates a more convincing My Hero Academia drawing without making the illustration unnecessarily complicated.
7. Refine the Details of Your Drawing
Now compare the complete sketch from top to bottom.
Look for:
- Uneven eyes
- Incorrect face proportions
- Hair that doesn’t follow the head
- A misplaced scar
- Uneven shoulders
- Missing costume details
- Excess construction lines
Erase unnecessary guidelines carefully.
Then strengthen the important lines around the:
- Face
- Hair
- Eyes
- Scar
- Neck
- Costume
- Outer body silhouette
The final outline should be clearer than the initial sketch.
How Can You Make a Shoto Todoroki Drawing Look Better?
The biggest improvement usually comes from cleaner proportions and stronger line control, not from adding more details.
Use these three techniques:
1. Clean outlines
Vary the pressure of your pencil or pen. Important outer contours can be slightly stronger than interior details.
2. Better proportions
Before finalizing the face, check the distance between the eyes, nose, mouth, jaw, and hairline.
3. Simple shading
Add shadows beneath the hair, around the neck, under the collar, and inside deeper costume folds.
You can also add subtle highlights to the hair and eyes. Avoid shading everything equally because that can make the character look flat.
How to Color a Shoto Todoroki Drawing
Coloring is where Todoroki’s distinctive design becomes especially recognizable.
For a traditional Shoto Todoroki coloring approach, separate the two sides of his hair before applying color.
A simple palette includes:
| Feature | Suggested Color |
|---|---|
| Hair, one side | White |
| Hair, other side | Crimson/red |
| Eye, one side | Grey |
| Eye, other side | Turquoise/blue |
| Scar | Pink/red tones |
| Costume | Dark and contrasting tones |
| Ice effects | Cool blue/white |
| Fire effects | Red/orange |
The exact shades can vary depending on the reference, art style, or medium you’re using.
Coloring order
- Fill the large hair sections.
- Color the eyes carefully.
- Add the facial scar.
- Complete the costume.
- Add light shadows.
- Add highlights.
- Finish with ice or fire effects if desired.
For a Shoto Todoroki coloring page, you can leave the background white and concentrate on clean, separated color areas.
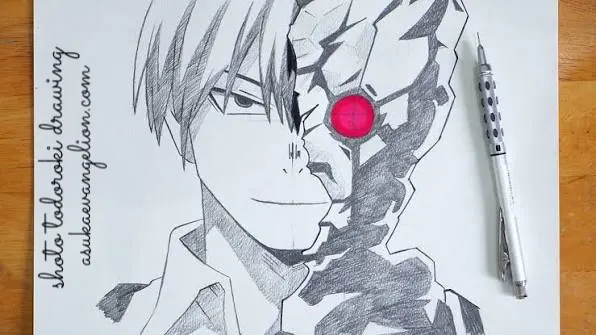
Easy Shoto Todoroki Drawing Tips for Beginners
If you’re new to anime art, don’t try to perfect the entire character on your first attempt.
Instead, practice each part separately.
Practice Todoroki’s face
Draw the head repeatedly while experimenting with:
- Eye placement
- Jaw shape
- Hairline
- Scar position
- Different expressions
Practice his hair
The two-toned hairstyle is excellent practice for learning how to group manga hair into larger sections.
Practice anime eyes
Draw several pairs of eyes before attempting the complete face. Experiment with iris size, eyebrow position, and eyelid shapes.
Use references
A reference image can help you understand proportions, costume details, and the placement of recognizable features. However, don’t rely on tracing if your goal is to improve your drawing skills.
Don’t erase too early
Your construction sketch is useful. Finish the major proportions first, then erase the guidelines after the character’s structure is correct.
Is Shoto Todoroki Drawing Hard?
It can be moderately challenging for a complete beginner, but the character becomes much easier when you break the drawing into sections.
The most challenging areas are usually the hair, eyes, scar placement, and costume details. Beginners can simplify the costume and start with a head-and-shoulders portrait before attempting a full-body version.
If your first drawing doesn’t look perfect, that’s normal. Repeating the same character several times is one of the fastest ways to understand anime proportions.
How to Draw Shoto Todoroki With Color
For a Shoto Todoroki drawing with colour, complete your pencil sketch before adding color.
The most important coloring feature is the contrast between his white and crimson hair. His eyes also provide an additional contrast that makes the face recognizable.
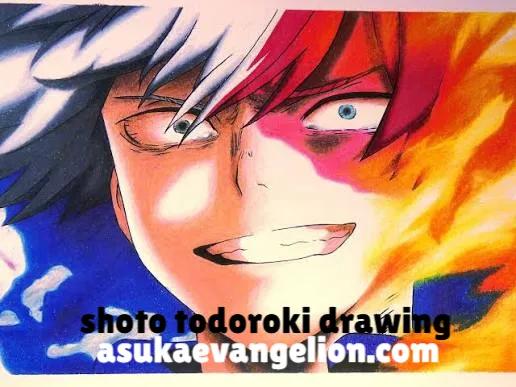
For a more dynamic illustration, you can place cool blue ice effects on one side and warm fire effects on the other. This visually connects the artwork to Todoroki’s Half-Cold Half-Hot Quirk, which is officially described as producing ice from one side and fire from the other.
Keep the effects behind or around the character rather than covering important facial details.
How to Draw a Full-Body Shoto Todoroki
A Shoto Todoroki drawing full body requires more planning than a portrait.
Use this sequence:
- Draw a stick figure to establish the pose.
- Add simple shapes for the torso and limbs.
- Establish the head and hair.
- Add the face and scar.
- Build the costume around the body.
- Draw hands and boots.
- Refine clothing folds.
- Erase construction lines.
- Add line art and shading.
- Finish with color or Quirk effects.
For beginners, start with a straight standing pose before attempting an action pose.
Easy Anime Drawing Ideas After Todoroki
Once you finish your Todoroki sketch, you can use the same construction method for other My Hero Academia characters.
Try practicing:
- Different anime face shapes
- Hero costumes
- Character hairstyles
- Anime eyes
- Full-body poses
- Action poses
- Fire and ice effects
- Manga-style expressions
The same basic principles—construction shapes, guidelines, proportions, clean outlines, and controlled shading—can be applied to many anime and manga drawing projects.
source: easydrawingguides.com
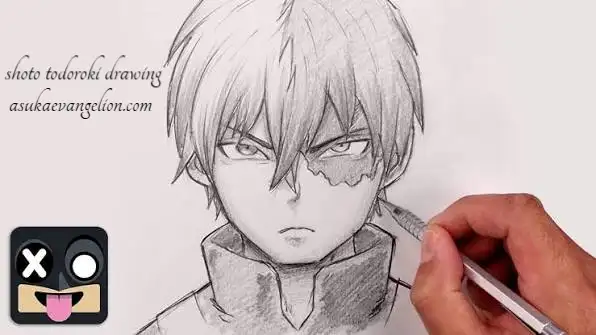
Final Thoughts
A successful Shoto Todoroki drawing doesn’t depend on getting every line perfect on the first attempt. The most useful strategy is to simplify the character into manageable parts and build the illustration gradually.
Start with the head and face shape, establish the two-toned hair, position the eyes, add the scar, and then move into the neck, shoulders, and costume. Once your outline is clean, use Todoroki’s contrasting hair and eye colors to bring the drawing to life.
For beginners and kids, a head-and-shoulders portrait is a good starting point. More experienced artists can extend the same construction process into a full-body pose with costume details, ice effects, and fire effects.
Todoroki’s distinctive visual design makes him particularly useful for drawing practice. His combination of simple anime facial structure and highly recognizable features gives artists several individual elements to practice while still producing a character that is immediately identifiable.
Custom FAQs
Is anime drawing hard?
Anime drawing can be challenging at first, but beginners can make it much easier by learning basic shapes and proportions before adding details. Start with simple faces, eyes, hair, and upper-body sketches before moving into full-body characters.
Is Shoto Todoroki drawing hard?
A detailed Todoroki drawing can be moderately difficult because of his two-toned hair, facial scar, costume, and distinctive eyes. However, breaking the character into simple construction shapes makes the process much easier for beginners.
How do you draw Shoto Todoroki with colour?
First complete the pencil outline, then color his two-toned hair separately. Use white and crimson/red for the hair, contrasting colors for his eyes, and darker tones for his costume. You can add blue ice and red-orange fire effects for a dynamic finish.
How do you draw Shoto Todoroki full body?
Begin with a simple stick figure to establish the pose, then build the torso and limbs with basic shapes. Add the head, hair, face, costume, hands, and boots before refining the outlines and adding shading or color.
How do you make an easy Shoto Todoroki drawing?
Start with a head-and-shoulders portrait rather than a full-body pose. Use an oval for the head, guidelines for the eyes, simple shapes for the hair, and a few lines for the scar and facial features. Add details only after the basic proportions are correct.
Also Read